EMF shielding paint is one of the few consumer products that actually does what it claims — block radio frequency (RF) radiation. Unlike “EMF harmonizer” stickers or crystal pendants, shielding paint uses real physics: a layer of conductive material (usually carbon or nickel) that reflects electromagnetic waves before they enter your living space.
But is it worth the cost and effort? When does it make sense, and when is it overkill? This guide covers everything you need to know.

How EMF Shielding Paint Works
EMF shielding paint contains conductive particles — typically carbon black, nickel, or copper — suspended in a standard latex or acrylic paint base. When applied to walls or ceilings, these particles create a continuous conductive layer that reflects RF radiation.
The principle is the same as a Faraday cage, just applied as paint. When electromagnetic waves hit a conductive surface, the free electrons in the conductor oscillate in response and re-radiate the energy — effectively bouncing the signal back.
Key Specifications
- Attenuation: Most quality shielding paints provide 20-40+ dB of RF reduction per coat. For context, 20 dB = 99% reduction, 30 dB = 99.9% reduction, 40 dB = 99.99% reduction.
- Frequency range: Effective from roughly 50 MHz to 18+ GHz, covering cell towers, Wi-Fi, 5G (including mmWave), and most wireless signals.
- Application: Typically applied like regular paint with a roller or sprayer. Most products require 1-2 coats for effective shielding.
- Grounding: For maximum effectiveness, the paint layer should be electrically grounded. This connects the conductive layer to your home’s ground, allowing it to safely dissipate absorbed energy.
When EMF Shielding Paint Makes Sense

Good Candidates:
- Bedroom walls facing a cell tower. Sleep quality is the most common concern. If your bedroom wall directly faces a tower within 300 meters, shielding that wall can meaningfully reduce nighttime RF exposure.
- Homes very close to cell towers. Within 200 meters, RF levels may be measurably elevated. Check your distance on EMF Radar →
- Nurseries and children’s rooms. If a child’s room faces a tower, parents often want extra precaution. Children’s developing bodies may be more susceptible to environmental exposures.
- Home offices in high-RF areas. If you spend 8+ hours a day in a room with elevated RF, shielding can reduce cumulative exposure.
- Multi-unit buildings. Apartments surrounded by neighbors’ Wi-Fi networks can have surprisingly high ambient RF levels.
Probably Overkill:
- Homes more than 500 meters from the nearest tower. RF levels from towers at this distance are typically very low.
- Interior walls only. RF primarily enters through exterior walls, windows, and roofs. Painting only interior walls won’t help much.
- Whole-house application when only one wall faces the source. Target the specific exposure path rather than painting everything.
Check your EMF exposure
See cell towers, power lines, and substations near any US address.
Search Your AddressTop EMF Shielding Paints
1. YShield HSF54 (High Frequency Shielding Paint)
- Attenuation: 36 dB per coat (1 coat), 43 dB (2 coats)
- Frequency range: Up to 18 GHz
- Base: Water-based acrylic
- Coverage: ~55 sq ft per liter (1 coat)
- Price: ~$70-80 per liter
- Notes: The industry standard. German-made, widely used by building biologists. Requires grounding kit (sold separately). Can be painted over with any standard interior paint. Low-VOC.
Best for: Maximum shielding. If you want the strongest protection available, this is the go-to product.
2. YShield HSF64 (Interior/Exterior)
- Attenuation: 39 dB per coat
- Frequency range: Up to 18 GHz
- Base: Silicate-based
- Coverage: ~55 sq ft per liter
- Price: ~$90-100 per liter
- Notes: Weather-resistant version suitable for exterior application. Higher attenuation than HSF54 but more expensive. Breathable (allows moisture vapor through).
Best for: Exterior walls, basements, or areas where moisture resistance matters.
3. Woremor RF-IE50 (Interior/Exterior)
- Attenuation: 40+ dB (2 coats)
- Frequency range: Up to 18 GHz
- Base: Water-based
- Coverage: ~50 sq ft per liter
- Price: ~$65-75 per liter
- Notes: Slightly more affordable alternative to YShield. Good attenuation numbers. Available in larger quantities (5L buckets).
Best for: Budget-conscious projects or larger areas where cost matters.
4. CuPro-Cote (Copper-Based)
- Attenuation: 20-35 dB depending on coat thickness
- Frequency range: Up to 10 GHz
- Base: Acrylic latex with copper particles
- Coverage: ~100 sq ft per gallon
- Price: ~$200-250 per gallon
- Notes: Copper-based rather than carbon. Has antimicrobial properties as a bonus. Lower attenuation than top carbon-based paints but easier to find in the US.
Best for: Users who prefer copper-based shielding or want antimicrobial properties.
Application Guide

What You’ll Need:
- EMF shielding paint (calculate coverage: wall area ÷ coverage per liter × number of coats)
- Grounding kit (typically includes grounding strip, wire, and plug)
- Standard paint roller (short nap, 3/8” or 1/4”)
- Painter’s tape
- Drop cloths
- An EMF meter (to measure before and after — this validates your work)
Step-by-Step:
1. Measure Before You Paint
Before applying anything, take RF readings with an EMF meter at multiple points on the wall(s) you plan to shield. Record these readings — you’ll want to compare after application. If readings are already very low, shielding paint may not be necessary.
2. Surface Preparation
- Clean walls thoroughly. Remove loose paint, dust, and debris.
- Fill any holes, cracks, or gaps. The shielding is only as good as its continuity — gaps in the conductive layer will allow RF through.
- Apply painter’s tape to edges, trim, and areas you don’t want painted.
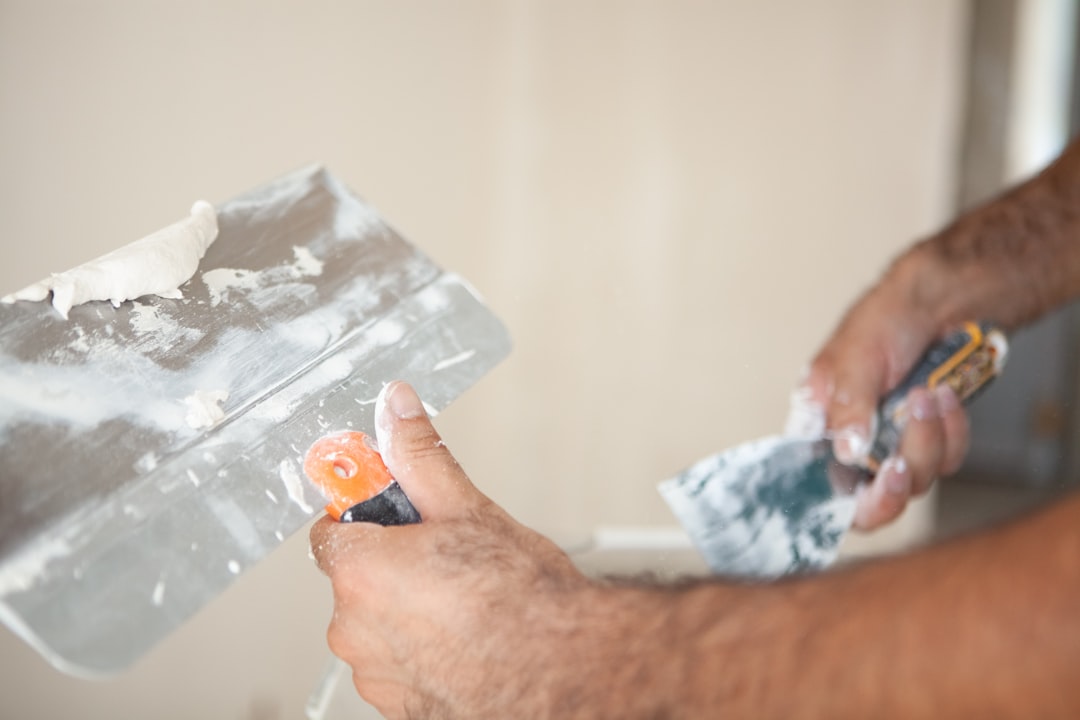
3. Apply First Coat
- Stir paint thoroughly (conductive particles settle).
- Apply with a roller in even, overlapping strokes. Ensure full, consistent coverage — thin spots reduce effectiveness.
- Roll in alternating directions (vertical then horizontal) to ensure even particle distribution.
- Allow to dry per manufacturer instructions (typically 4-6 hours between coats).
4. Apply Second Coat (Recommended)
A second coat typically adds 5-10 dB of additional attenuation and fills any thin spots from the first coat. For maximum protection, a second coat is strongly recommended.
5. Install Grounding
- Apply the grounding strip along one edge of the painted area while the final coat is still tacky (or use conductive adhesive).
- Connect grounding wire from the strip to a grounded outlet or your home’s grounding system.
- Test continuity with a multimeter to confirm the ground connection.
6. Apply Finish Coat
Cover the shielding paint with your chosen standard interior paint. Shielding paint is typically dark gray or black — you’ll want a finish coat for aesthetics. Any standard interior paint works; it won’t reduce the shielding effectiveness.
7. Measure After
Take the same RF readings you measured in step 1. You should see a significant reduction (20-40+ dB depending on product and coats). If readings haven’t changed, check for gaps, uncovered areas, or windows that are allowing RF to bypass the painted wall.
Windows: The Weak Link
Paint only helps if RF isn’t bypassing it through windows. If you shield a wall but leave a large window unshielded, RF will enter through the glass. Options for windows:
- RF shielding window film: Metallic window films (similar to car tint) that reflect RF. 10-25 dB reduction typically.
- Shielding curtains: Fabric curtains with metallic thread. Can be opened during the day. 15-30 dB when closed.
- Nothing: If the window doesn’t face the RF source, it may not need treatment.
Cost Estimate
For a typical bedroom wall shielding project (one exterior wall, ~120 sq ft):
| Item | Cost |
|---|---|
| Shielding paint (2.5L, 2 coats) | $175-200 |
| Grounding kit | $30-50 |
| Window film (if needed, one window) | $40-60 |
| Painting supplies | $20-30 |
| Total | $265-340 |
For whole-room shielding (all four walls + ceiling, ~500 sq ft):
| Item | Cost |
|---|---|
| Shielding paint (10L, 2 coats) | $700-800 |
| Grounding kit | $30-50 |
| Window film (2 windows) | $80-120 |
| Painting supplies | $30-40 |
| Total | $840-1,010 |
Does It Actually Work? Real-World Results
Here’s what building biologists and independent testers consistently report:
- Before shielding: 0.1-5.0 mW/m² (typical readings near cell towers, within 300m line of sight)
- After 2 coats of quality shielding paint: 0.001-0.05 mW/m² (a 20-40x reduction)
- After paint + window film + grounding: 0.0001-0.01 mW/m² (approaching background levels)
The Building Biology Institute’s guidelines recommend sleeping areas below 0.1 mW/m² (“slight concern”) with a target of below 0.01 mW/m² (“no concern”). Properly applied shielding paint can achieve these levels even in tower-adjacent homes.
However: Results vary significantly based on:
- Quality of application (gaps and thin spots reduce effectiveness)
- Whether windows are addressed (often the primary bypass route)
- Other RF sources inside the home (Wi-Fi router, smart devices — these are inside your shield)
- Wall construction (existing metal in walls may already provide partial shielding)
Common Mistakes to Avoid

-
Not measuring before and after. Without measurements, you’re guessing whether it worked. Rent or buy a basic RF meter.
-
Ignoring windows. A perfectly shielded wall with an unshielded window is like locking your door but leaving the window open.
-
Forgetting to ground. Ungrounded shielding paint still works but is less effective and can theoretically re-radiate some absorbed energy. Grounding is cheap and easy — do it.
-
Painting interior walls instead of exterior. RF enters from outside. Shield the walls facing the source, not the walls between rooms.
-
Thin, uneven application. Shielding paint needs consistent, thick coverage. Don’t try to stretch it thin to save money.
-
Shielding Wi-Fi inside the shielded room. If your Wi-Fi router is inside the shielded room, the paint will trap the signal inside. Move the router outside the shielded area, or switch to wired ethernet in that room.
-
Not addressing the floor or ceiling. If the RF source is elevated (like a tower), radiation may enter from above. If you’re in an apartment, the floor and ceiling may need treatment too.
Should You DIY or Hire a Professional?
DIY is fine if:
- You’re comfortable with basic painting
- You have or can rent an EMF meter to validate results
- You’re shielding 1-2 walls in a specific room
- You can follow the grounding installation instructions
Consider a professional if:
- You want whole-house shielding
- Your home has complex RF exposure from multiple directions
- You’re unsure about electrical grounding
- You want certified Building Biology testing and documentation
Building biologists (IBN/BBIOA certified) specialize in this work. Expect to pay $500-2,000+ for professional assessment and installation guidance, depending on scope.
The Bottom Line
EMF shielding paint is a legitimate, physics-based product that measurably reduces RF exposure in your home. It’s not magic, it’s not a scam — it’s conductive material that reflects electromagnetic waves. The key is proper application: full coverage, grounding, addressing windows, and verifying results with a meter.
Is it worth it? That depends on your situation:
- Living within 200 meters of a cell tower, bedroom faces it? Strongly worth considering.
- General concern but no specific high-exposure situation? Simpler steps (distance from devices, router placement, wired connections) may be sufficient — see our guide to reducing EMF exposure at home.
Start by checking your cell tower proximity on EMF Radar to understand your actual exposure situation. Data first, decisions second.
Related Articles
- How to Block EMF from a Cell Tower: Shielding Guide
- RF Shielding Film for Windows: Cost and Results
- Faraday Cage for Your Bedroom: EMF Bed Canopy Guide 2026
- EMF Blocking Clothing: What Works and What Doesn’t
- How to Measure EMF in Your Home: A Complete Guide
Wondering how close the nearest cell tower is to your home? Search any US address for free on EMF Radar →
Related Reading
- EMF Protection During Pregnancy — Room-by-Room Guide
- How to Test EMF in Your Home: A Room-by-Room Measurement Guide
- How to EMF-Proof Your Home: A Room-by-Room Guide
- How to Block EMF from a Cell Tower: Shielding Guide
Concerned about EMF in your home? Check your address on EMF Radar to see nearby cell towers and power lines, or find a certified EMF consultant for a professional home assessment.